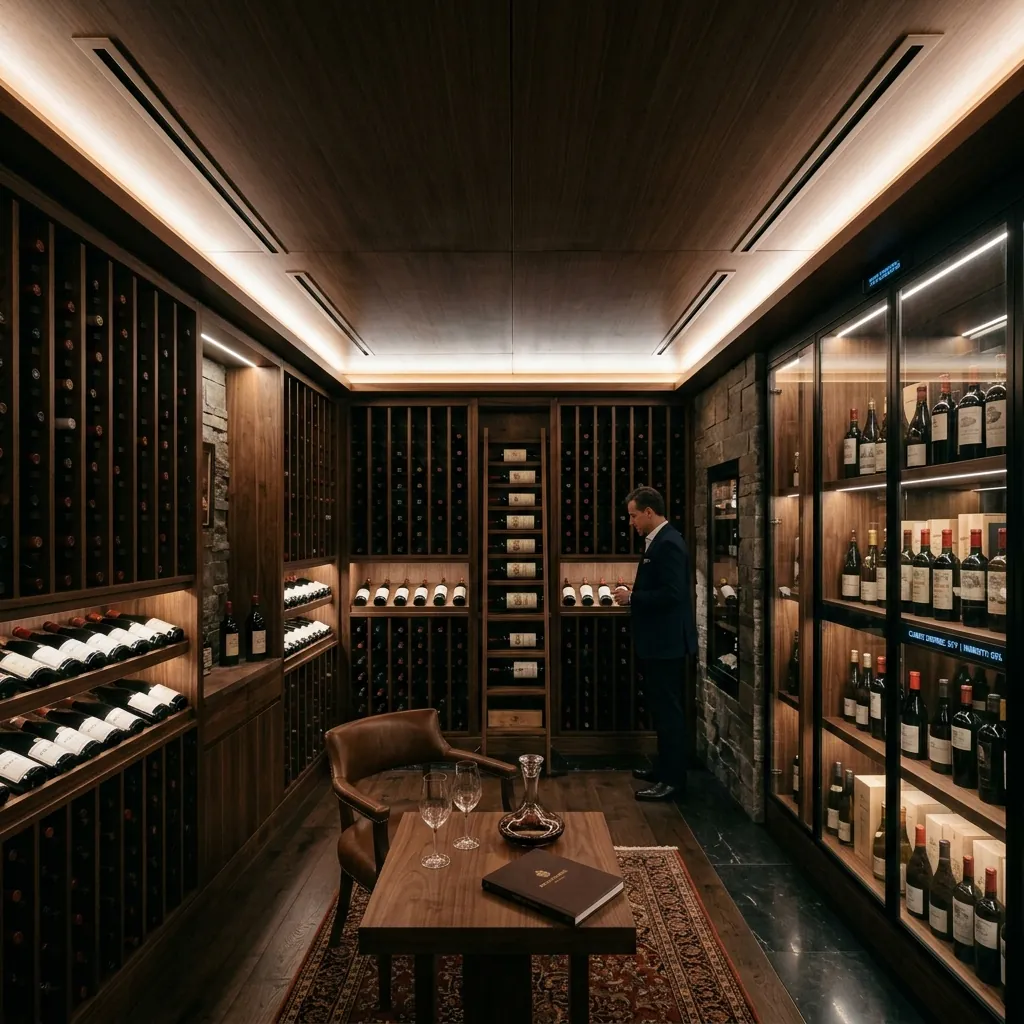
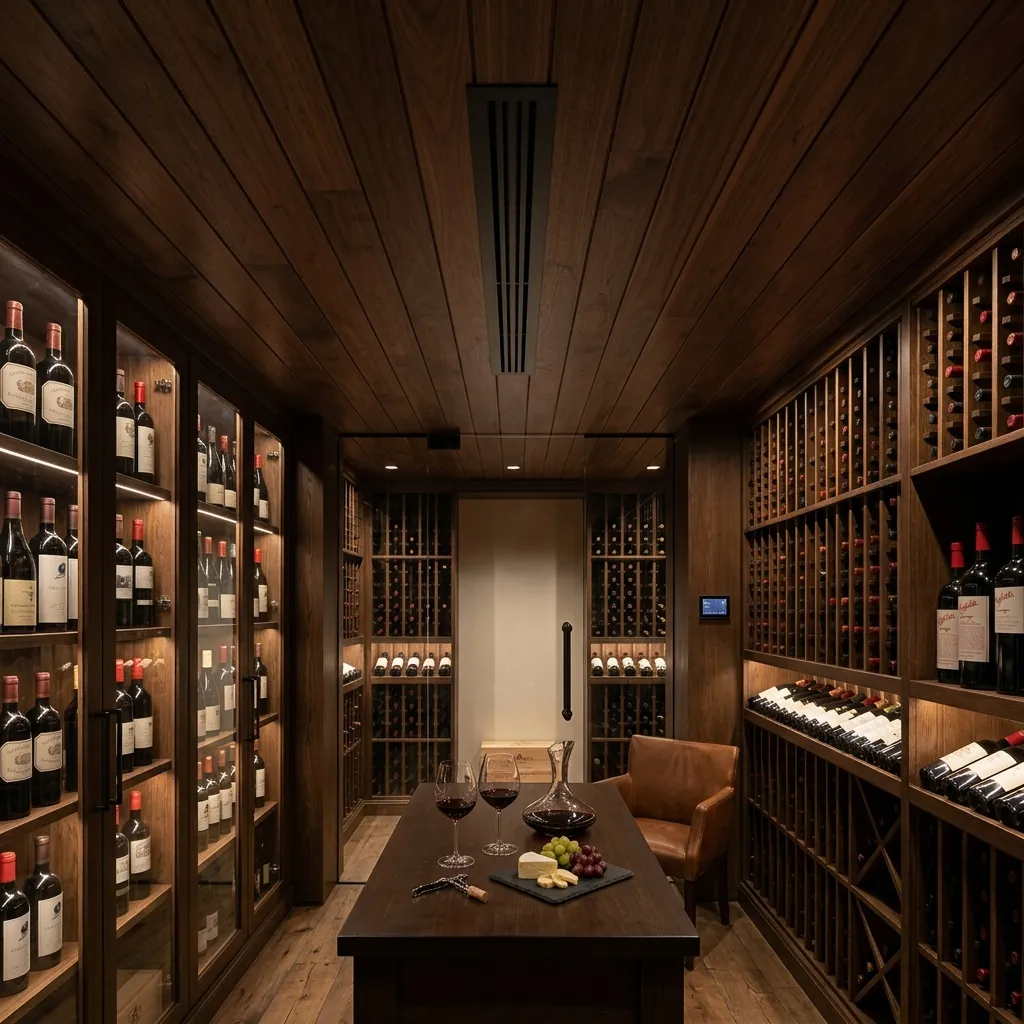
Designing a multi-zone wine cellar requires more than cooling power—it demands precision climate control that protects every bottle, balances different storage needs, and maintains consistent conditions across distinct cellar areas. VA Wine Cooling helps you create a refined environment where each zone performs exactly as intended, from display spaces to long-term aging rooms.
Book a ConsultationA multi-zone wine cellar is not simply a larger wine room with a stronger cooling unit; it is a carefully engineered environment in which different areas may serve different purposes, hold different bottle types, and experience different traffic patterns, all while remaining stable enough to preserve wine quality over time. That complexity is exactly why climate control design matters so much. In a single-zone cellar, the goal is straightforward: maintain one consistent temperature and humidity level throughout the space. In a multi-zone cellar, however, the challenge becomes more nuanced. One zone may be designed for long-term aging at a steady, low-disturbance temperature, while another may be intended for ready-to-serve bottles at a slightly different set point. A third zone might be a display feature visible from a tasting room, where aesthetics, lighting, and access all influence the cooling strategy. Each of these spaces has unique demands, and the success of the entire cellar depends on how well those demands are balanced through thoughtful system design, proper equipment selection, and precise installation. At VA Wine Cooling, we understand that climate control for multi-zone wine cellars is as much about engineering and planning as it is about refrigeration. The right approach considers insulation, vapor barriers, door placement, return air pathways, load calculations, and the relationship between each individual zone so that the system operates efficiently without creating hot spots, cold pockets, or humidity imbalances. When a cellar is designed correctly from the start, the result is not just better wine preservation—it is a more reliable, more beautiful, and more enjoyable wine storage experience that supports both collectors and commercial spaces with equal confidence.
Independent temperature management allows each zone to be tailored to its specific purpose, whether that means maintaining ideal aging conditions, creating a serving-ready section, or preserving a display area with minimal fluctuation. This flexibility is one of the defining advantages of a well-designed multi-zone wine cellar.
Balanced humidity control helps protect corks, labels, and overall wine integrity by preventing excessive dryness or moisture buildup. In a multi-zone setting, humidity must be managed carefully so that every compartment stays within the proper range without compromising adjacent areas.
Optimized airflow design ensures that cooled air reaches every section evenly and returns efficiently to the system, reducing temperature swings and improving performance. Proper circulation is essential in multi-zone cellars where partitions, shelving, and room geometry can easily disrupt climate consistency.
Custom system integration brings together cooling equipment, insulation, controls, and cellar layout into one coordinated solution. This approach makes it possible to design multi-zone wine cellars that are efficient, attractive, and dependable for long-term storage and entertaining alike.
Designing climate control for a multi-zone wine cellar begins long before equipment is selected. The first and most important step is understanding how the cellar will actually be used, because use case drives everything from temperature targets to airflow design and refrigeration capacity. A collector who wants a dedicated aging zone, a presentation zone for prized bottles, and a service zone for ready-to-drink wines will need a very different layout than a restaurant that wants to separate reserve stock, rotating inventory, and display bottles for guests. The purpose of each zone determines the ideal set point, the amount of access traffic it will receive, and the level of environmental stability required. A long-term aging zone typically benefits from a consistent temperature with minimal variation, while a service or display zone may tolerate slightly different conditions so long as the wine remains protected and easy to access. The key is not to force every area into the same mold, but to define each zone intentionally so the system can support it without overworking or creating uneven conditions.
Once the cellar’s purpose is clear, the next layer of planning involves physical separation and the way each zone interacts with the others. Multi-zone wine cellars often rely on architectural divisions such as glass walls, insulated partitions, framed enclosures, or concealed transitions between spaces. These elements are important not only for appearance but also for climate integrity. If one zone is warmer because it is frequently opened, exposed to light, or connected to a tasting area, that heat should not easily migrate into the aging zone. Likewise, if one compartment is maintained at a slightly lower temperature for serving, the surrounding zones must be insulated well enough to keep the system from constantly compensating. This is where precise design becomes essential. Door placement, partition material, and even the direction of air return can influence how efficiently the cellar operates. A beautiful design that ignores these details may look impressive at first glance, but over time it can lead to uneven cooling, excess condensation, and unnecessary wear on the refrigeration equipment.
Temperature zoning also has to account for bottle placement and storage density. A densely packed cellar with floor-to-ceiling racking behaves differently than a more open showcase cellar with display niches and tasting access. Dense storage can restrict airflow, which means the cooling system must be designed to move conditioned air effectively without blowing directly on the bottles. Open display areas may allow more air movement, but they can also introduce more light and ambient heat from adjacent rooms. In a multi-zone environment, these differences matter because each section may require a distinct balance between cooling output and air distribution. The best design does not simply cool the room; it creates a stable microclimate in every zone. That stability is what protects wine from premature aging, sediment disturbance, and cork degradation, while also keeping the cellar comfortable and visually appealing for everyday use.
Humidity is another critical factor in planning climate zones, especially because different cellar areas may experience different moisture loads. A zone with frequent door openings or glass exposure may lose humidity more quickly than a sealed aging compartment. If humidity drops too low, corks can dry out and labels may become brittle or damaged. If it rises too high, mold and mildew can develop on wood, walls, or packaging. The challenge in multi-zone wine cellar design is to maintain a healthy balance across all areas without creating isolated pockets of dampness or dryness. This requires careful attention to insulation quality, vapor barriers, and the way each zone is sealed. It also requires selecting equipment that can support the cellar’s total environmental load rather than just its square footage. A properly planned system recognizes that humidity and temperature are connected, and that a zone-by-zone approach is often necessary to keep both in range.
Another important planning consideration is how the cellar will be experienced by the user. In luxury residential applications, multi-zone cellars often serve as architectural focal points, combining storage, display, and entertainment in one cohesive space. In commercial settings, they may be used to organize inventory by service needs or varietal categories. In either case, the climate plan should support usability without sacrificing preservation. A tasting section might need easier access and a slightly different temperature than a long-term storage wall. A display zone may need lighting that is carefully selected to reduce heat output. A service zone may require faster access and more frequent door openings, which means the adjacent climate system must recover quickly. Designing these realities into the cellar from the beginning is far more effective than trying to compensate later with oversized equipment or reactive fixes. That is why expert planning is the foundation of every successful multi-zone cellar: it creates a space that works in real life, not just on paper.
Essential Wine Cellar Engineering Resources:
After the cellar’s zones have been defined, the next step is choosing the right cooling equipment and control strategy to make those zones perform reliably. This is where many projects succeed or fail, because multi-zone wine cellars require more than a standard refrigeration solution scaled up in size. They need a system architecture that can respond to different thermal loads, maintain separate set points, and preserve efficiency even when each area behaves differently. Depending on the design, this may involve multiple self-contained cooling units, a ducted split system with independently controlled areas, or a custom-engineered solution that integrates sensors, thermostats, and air handlers across several compartments. The correct choice depends on cellar size, construction type, insulation quality, aesthetic goals, and how much flexibility the owner wants in day-to-day operation. A well-selected system should not feel complicated to use; rather, it should quietly and consistently maintain the conditions each zone needs without constant adjustment.
Controls are especially important in multi-zone environments because precision is what separates a functional cellar from a truly refined one. Digital thermostats, remote monitoring, and zone-specific control panels allow owners and facility managers to track conditions in real time and make adjustments when needed. This is particularly valuable in cellars with different storage requirements, since one section may be designed to hold reds at a slightly warmer range while another section stores whites or sparkling wines at cooler conditions. Even when exact serving temperatures are not the priority, the ability to fine-tune each zone improves reliability and reduces the risk of overcooling or undercooling. Modern control systems can also help detect trends before they become problems, such as a gradual rise in temperature, recurring humidity loss, or compressor cycling that suggests the system is undersized or airflow is being restricted. In a high-value wine environment, those early warnings are not just convenient—they are essential protection for the collection.
Equipment sizing must be approached with special care in multi-zone wine cellar design. It is tempting to assume that each zone can be treated as an isolated room with a simple square-footage calculation, but that approach often overlooks the interconnected nature of the space. Heat transfer between zones, ambient room conditions, glass exposure, lighting loads, and the frequency of access all affect the actual cooling demand. A zone that sits near a kitchen, bar, or sunlit wall will require more capacity than a deeply insulated interior section of the same size. Likewise, a display zone with glass frontage may need more robust cooling support than a hidden storage zone. Undersized equipment can struggle to maintain temperature and humidity, while oversized equipment may short cycle, creating unstable conditions and unnecessary wear. The ideal solution is one that is matched to the cellar’s real-world thermal load, not just its dimensions on a blueprint.
Air distribution design is another major factor in equipment performance. In a multi-zone cellar, air must be moved in a way that supports even temperatures without creating drafts that could dry out corks or cause localized cold spots. This often means using ducting, return air planning, or carefully placed evaporators to ensure that every zone receives conditioned air in the right amount. Shelving layout and bottle orientation can also affect airflow, especially in compact cellars where the racks are built close to the walls. If air cannot circulate freely, some sections may become warmer than others, forcing the cooling system to work harder and less efficiently. A thoughtful design anticipates these issues by placing returns and supply points strategically, ensuring that the system is not fighting against the architecture of the cellar. This is one reason professional design and installation are so valuable: the right team can see how equipment, structure, and storage interact before problems begin.
Integration with the building envelope is equally important. The best cooling system in the world cannot perform properly if the cellar is not insulated, sealed, and vapor-protected to the correct standard. Multi-zone cellars are especially sensitive to these conditions because each zone may have a different exposure profile. One area might border a conditioned interior room, while another touches an exterior wall or a high-traffic hallway. The cooling system must be designed with those differences in mind, and the controls must be able to respond accordingly. Proper insulation reduces the burden on the equipment, while a continuous vapor barrier helps prevent moisture migration that can compromise both the cellar and the surrounding structure. When these elements are coordinated, the result is a system that runs more efficiently, maintains more consistent conditions, and provides a better long-term return on investment.
For many clients, the ultimate goal is simplicity: a sophisticated cellar that feels effortless to operate. That is why the best multi-zone systems are not merely powerful; they are intuitive, responsive, and tailored to the way the cellar will be used. Whether the project involves a residential showcase, a hospitality venue, or a private collector’s retreat, the equipment and controls should support the design rather than dictate it. At VA Wine Cooling, that means selecting systems that align with the cellar’s layout, load profile, and desired level of automation. The result is a climate-controlled environment where each zone does its job beautifully, quietly, and consistently, preserving the wine while enhancing the overall experience of the space.
The most successful multi-zone wine cellars are those in which technical performance and visual presentation work together seamlessly. Climate control is the hidden foundation, but design details determine how well the cellar functions over time and how compelling it feels to use. In a space that may include glass walls, decorative lighting, custom millwork, tasting counters, or integrated display shelving, every design choice has climate implications. Lighting, for example, should be selected not only for appearance but also for heat output and wavelength exposure, since excessive heat or ultraviolet light can damage wine and create unnecessary strain on cooling systems. In a multi-zone cellar, display areas often attract the most attention, so they must be designed with both beauty and protection in mind. Low-heat LED lighting, careful fixture placement, and strategic shading can preserve the visual impact of the room while minimizing thermal disruption.
The same principle applies to materials. Wood, metal, glass, and stone each interact differently with temperature and humidity, and those interactions can influence how the cellar feels and performs. Wood racking may add warmth and elegance, but it must be properly sealed and installed to withstand the controlled environment. Glass can create a striking architectural feature, yet it also introduces thermal transfer that must be offset through insulation and system design. Stone and other dense materials can help stabilize temperature, but they may also hold cold or moisture in ways that need to be accounted for. In a multi-zone cellar, these material choices should not be treated as purely decorative decisions. They are part of the climate strategy, and when selected thoughtfully they can improve both performance and longevity. This is especially important when different zones are intended for different uses, because each material can either support or complicate the environmental balance.
Accessibility is another design detail that affects climate control. A cellar with frequent traffic requires doors, transitions, and storage layouts that minimize the time conditioned air escapes. If one zone serves as a tasting or service area, it may need a more robust recovery strategy than a sealed aging compartment. Door hardware, thresholds, and sealing systems all play a role in how much outside air enters the space. Even the placement of shelving relative to the entry can influence how much ambient air reaches the bottles when the door opens. In a multi-zone environment, these factors are magnified because one zone’s activity can affect another if the separation is not properly engineered. A beautiful cellar that leaks air or allows heat transfer between zones will always be fighting an uphill battle. By contrast, a cellar designed with careful attention to access and sealing can remain stable even in active use, preserving wine quality while still feeling inviting and functional.
Another important detail is the relationship between aesthetics and maintenance. A well-designed multi-zone wine cellar should not only look impressive on day one; it should remain easy to service, inspect, and adjust over time. Access panels, discreet equipment placement, and service-friendly layouts can make a major difference in the long-term reliability of the system. If a cooling unit is difficult to reach or a sensor is buried behind fixed cabinetry, small issues can become large ones simply because they are harder to diagnose. Designing for maintenance does not mean sacrificing beauty. In fact, the best cellars often conceal their technical components elegantly while keeping them accessible enough for routine care. This balance is especially valuable in multi-zone projects, where multiple systems or controls may need to work together in a coordinated way. A smart layout reduces downtime, simplifies troubleshooting, and helps protect the investment for years to come.
Ultimately, the goal of multi-zone climate control is to create a cellar that feels effortless from the outside and precise from the inside. Every bottle should rest in an environment suited to its purpose, every zone should maintain the correct balance of temperature and humidity, and every design detail should contribute to that outcome. Whether the cellar is intended for a private home, a restaurant, a hospitality venue, or a luxury entertainment space, the right climate design transforms it from a storage room into a true wine experience. VA Wine Cooling specializes in helping clients achieve that transformation through custom solutions that align performance with aesthetics. By combining engineering discipline, careful planning, and a deep understanding of wine storage requirements, we create multi-zone cellars that are as dependable as they are beautiful, ensuring that the collection is protected while the space itself becomes a source of pride and enjoyment.
A multi-zone climate control system is ideal when your cellar serves more than one purpose or when different sections of the room experience different environmental demands. If you plan to store wines for long-term aging in one area, keep ready-to-serve bottles in another, or feature a display section with glass walls or frequent access, separate zones can help maintain the right conditions in each space. A single cooling strategy often struggles when the room has varied exposures, different traffic patterns, or distinct storage goals. Multi-zone design allows you to tailor temperature, airflow, and humidity more precisely, which improves wine preservation and makes the cellar easier to use. It is especially valuable in larger residential projects, hospitality settings, and custom showcase cellars where function and presentation must work together.
Yes, different zones can absolutely be designed to maintain different temperatures, and that is one of the main advantages of a multi-zone wine cellar. The exact temperature range for each zone depends on the type of wine being stored and the purpose of the area. For example, a long-term aging zone may be kept at a stable, consistent temperature, while a service zone might be maintained slightly cooler for bottles intended to be opened sooner. The key is to ensure that the system is engineered to support those different set points without creating instability, excessive cycling, or humidity problems. Proper insulation, zoning controls, and airflow planning are essential so that one zone does not interfere with another. When done correctly, different temperatures can coexist in one cellar without compromising performance.
One of the biggest mistakes is focusing too much on appearance or room size and not enough on the actual climate loads and usage patterns of each zone. Many projects underestimate how much heat enters through glass, lighting, adjacent rooms, or frequent door openings, and they assume that one larger cooling system can simply handle everything. In reality, multi-zone wine cellars require careful planning of insulation, vapor barriers, air distribution, and control logic so that each area remains stable on its own. Another common mistake is failing to consider how the zones interact with one another. If a service area is highly active but not properly separated from an aging zone, the fluctuations can affect the entire cellar. The most successful projects begin with a detailed design strategy that matches equipment to the cellar’s true environmental needs, rather than trying to correct problems after construction is complete.
Whether you need installation, service, or maintenance — our team is ready to help. Fill out the form below and we'll get back to you within 24 hours.
By submitting this form, you agree to our Privacy Policy. CSLB Lic#1055057
VA Wine Cooling engineers and maintains precision commercial and residential cooling systems across Southern California.